
In your class this week I’d like you to really focus on finding your neutral pelvis position.
It’s a strange concept to get the hang of but it’s important to understand because it gets your body into it’s correct alignment so that the joints and muscles that surround your spine work evenly.
What does neutral pelvis mean?
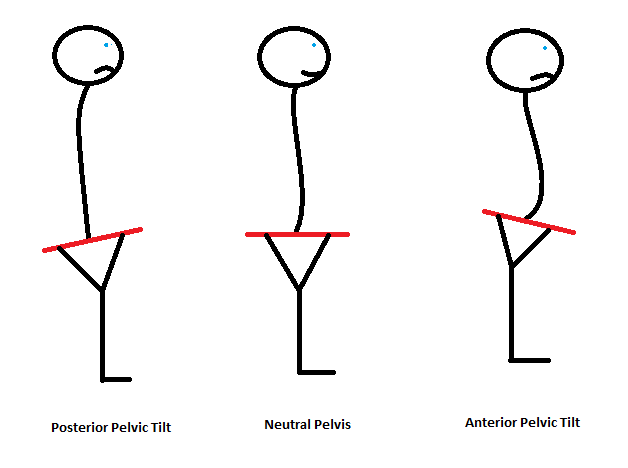
Your spine has three natural curves that form an s-shape. In a neutral spine position these three curves should be of equal size. The spine sits on top of the pelvis so the hollow curve in your lower back (lumbar spine) is influenced by the position of your pelvis. If your pelvis is rotated forward then the lumbar spine would increase in size. If your pelvis was rotated backwards then the lumbar spine would flatten.
How to find neutral pelvis
The easiest way to find neutral pelvis is to lay on your back with your knees bent and feet hip width apart. In class we may also practice pelvic tilting when standing and kneeling on all fours.
- Use your finger tips to notice the space underneath your lower back.
- Try tilting your pelvis backwards so that the lower back flattens into the floor. Relax back to where you started.
- Now try tilting your pelvis slightly forwards so that the hollow under your lower back increases.
- Stop in between these two extremes so that there is a natural curve in the lower back. Your spine should not be flat against the floor or over arching.
Remember nothing should increase any symptoms of pain. Move within a pain-free range of movement.
Homework Exercise
This exercise is also a useful way to improve mobility and release muscle tension in the lower back. Practice at home laying on your back, flattening your lower back into the mat and then returning to neutral pelvis.